

zh-CN
Introduction:
For people testing and learning networks, sometimes they need a router on x86 platforms. Therefore a OpenWRT virtual machine is a good option.
In this tutorial REG will guide you to install OpenWRT in x86 platform with VMware workstation and expand it’s root size. We are going to complete this work with a specific demo.
->Requirements:
Skills:
- Basic understanding of TCP/IP
- Basic Linux knowledge
- Debugging skills
Hardware:
- A computer with x86 cpu and more than 4Gib ram
- Smooth Internet access
Software:
- Windows operating system (versions 7 to 11) installed
- Vmware Workstation Pro (installed and activated)
- Finix CD Linux (download link provided below)
- OpenWRT x86_64 (download link and method provided below)
Before We Begin:
Assuming that:
- You have a clear understanding of your purpose with OpenWRT.
- You are clear that REG can still help u install openwrt but for config and usage REG can only offer a demo.
Preload:
now u can download Finix CD Linux While your are setup a vm to save your time 😉
and we will use wget to download openwrt in cmd later
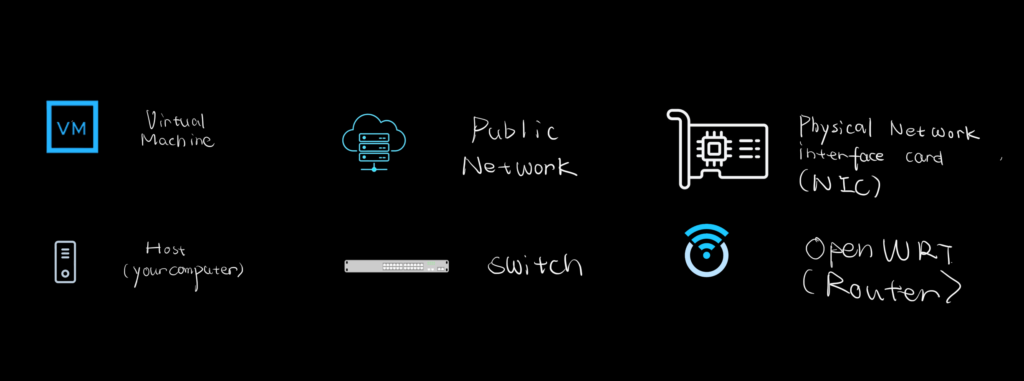
Icon Definition:
Video tutorial (from VanTechCorner):
REG leaned this method by this video, so spatial thanks to @VanTechCorner on youtube.
Useful links:
Download OpenWRT:
Download Finix CD Linux:
OpenWRT install on x86 platforms:
https://openwrt.org/docs/guide-user/installation/openwrt_x86
Related docs:
https://openwrt.org/docs/guide-user/advanced/expand_root
Create Virtual Machine
If you have a vm configured like this your can skip this step
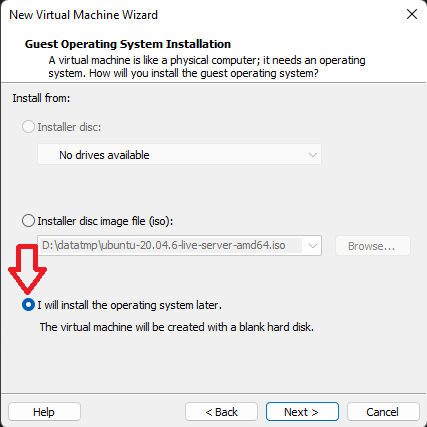
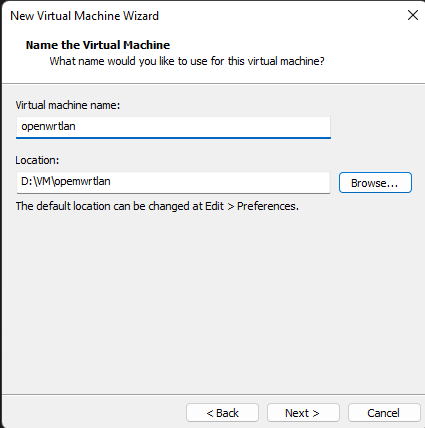
[0] Setup OS Info
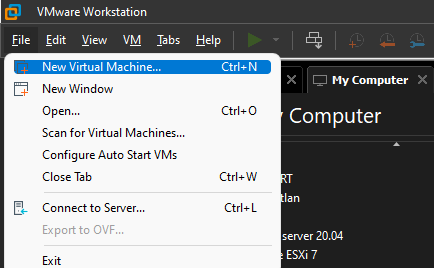
go to vmware workstation >File->New Virtual machine
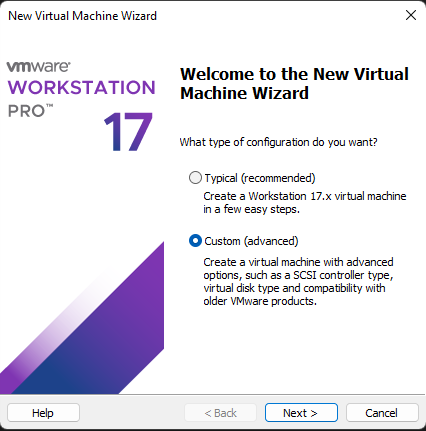
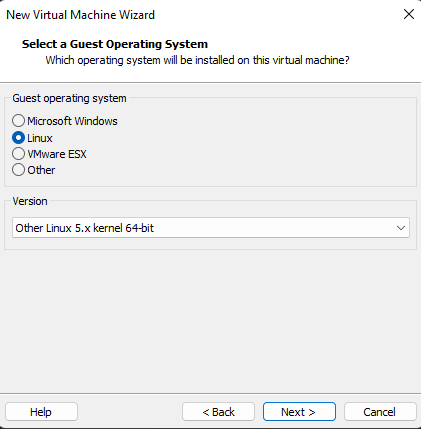
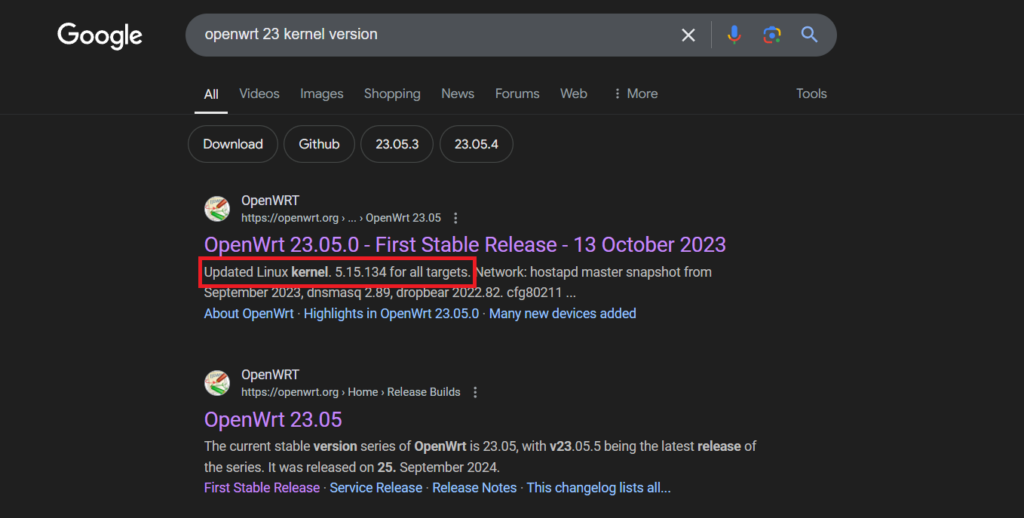
for selecting operating system versions you can GOOGLE what is the version of you selected openwrt
for ex REG choose openwrt 23.05.0
so REG should ask google: openwrt 23 kernnel version
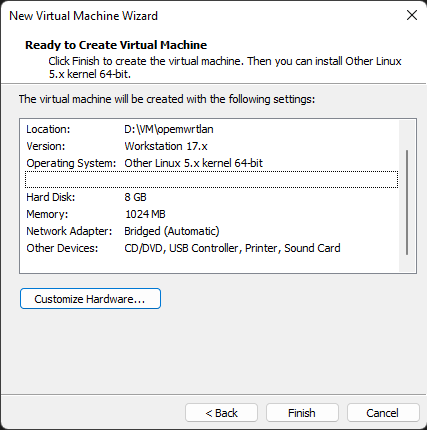
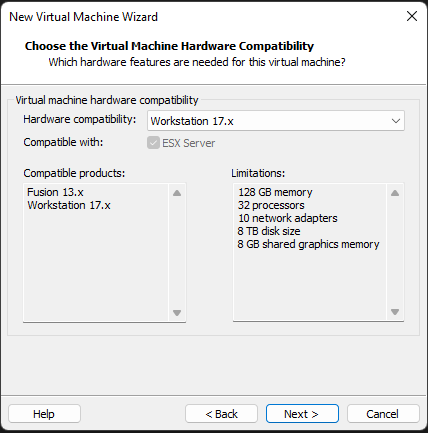
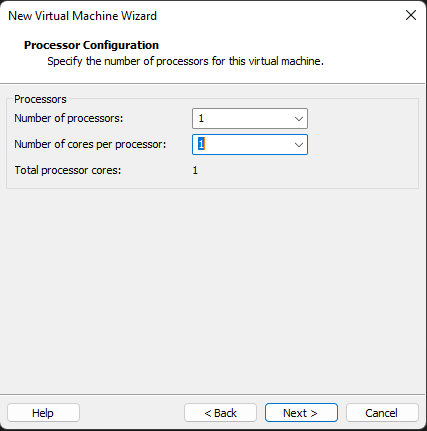
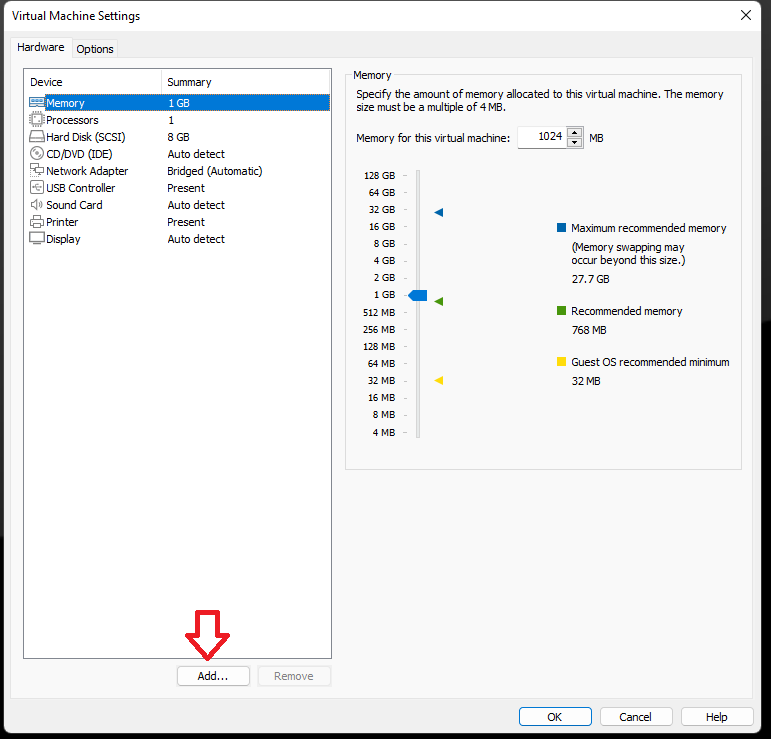
[1] Define Hardware

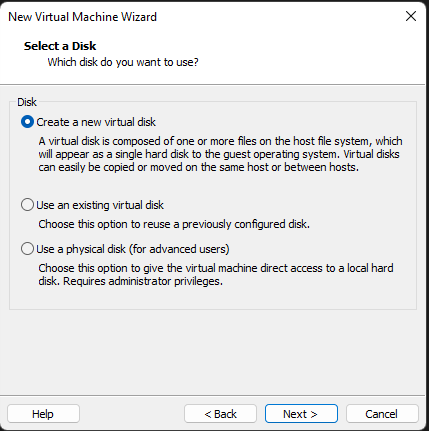
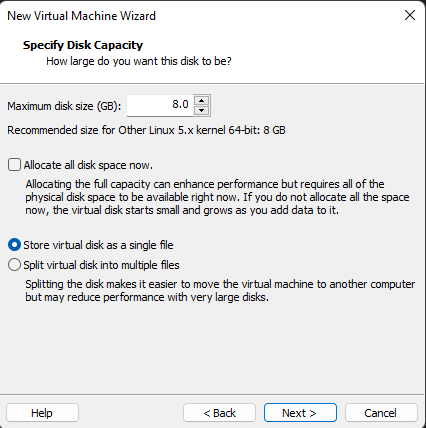
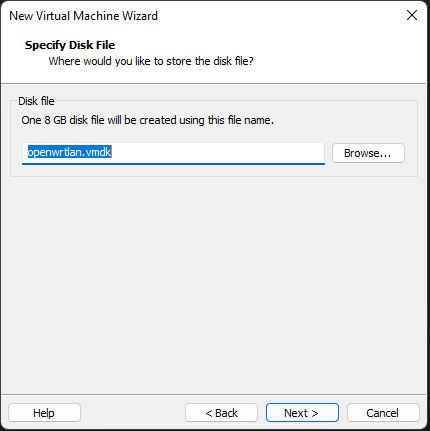
[2] Create VM Disk
these are REG’s preferred setups, u can modify them as your preference.
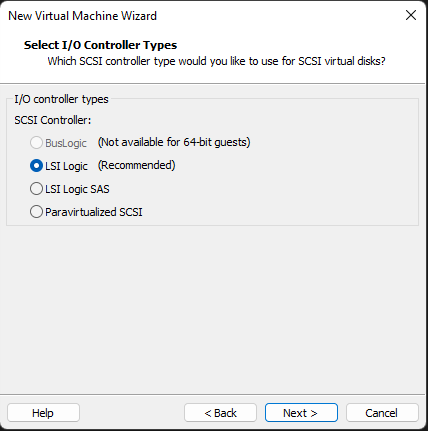

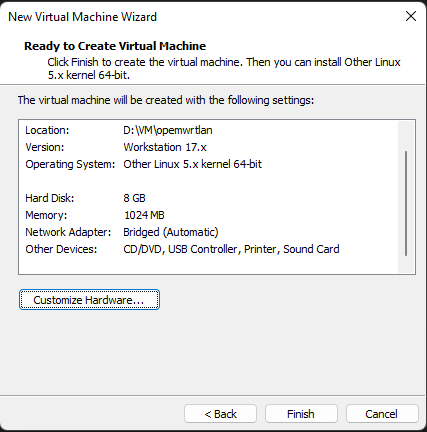
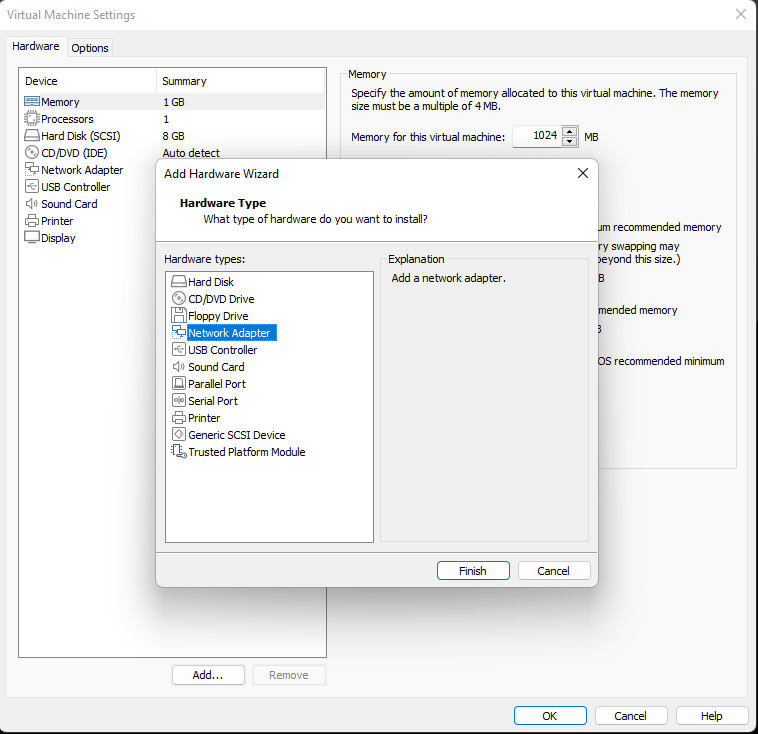
so here we have a vm configured, click Finish or Customize Hardware… if you want add more network interfaces or hardwares.
Edit Virtual Networks
3 VMware Network Modes
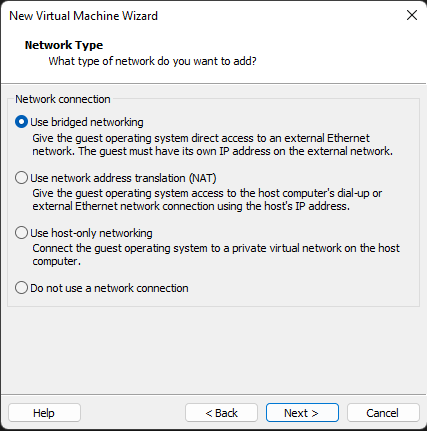
In vmware workstation there are 3 network modes:
- Bridged
- NAT
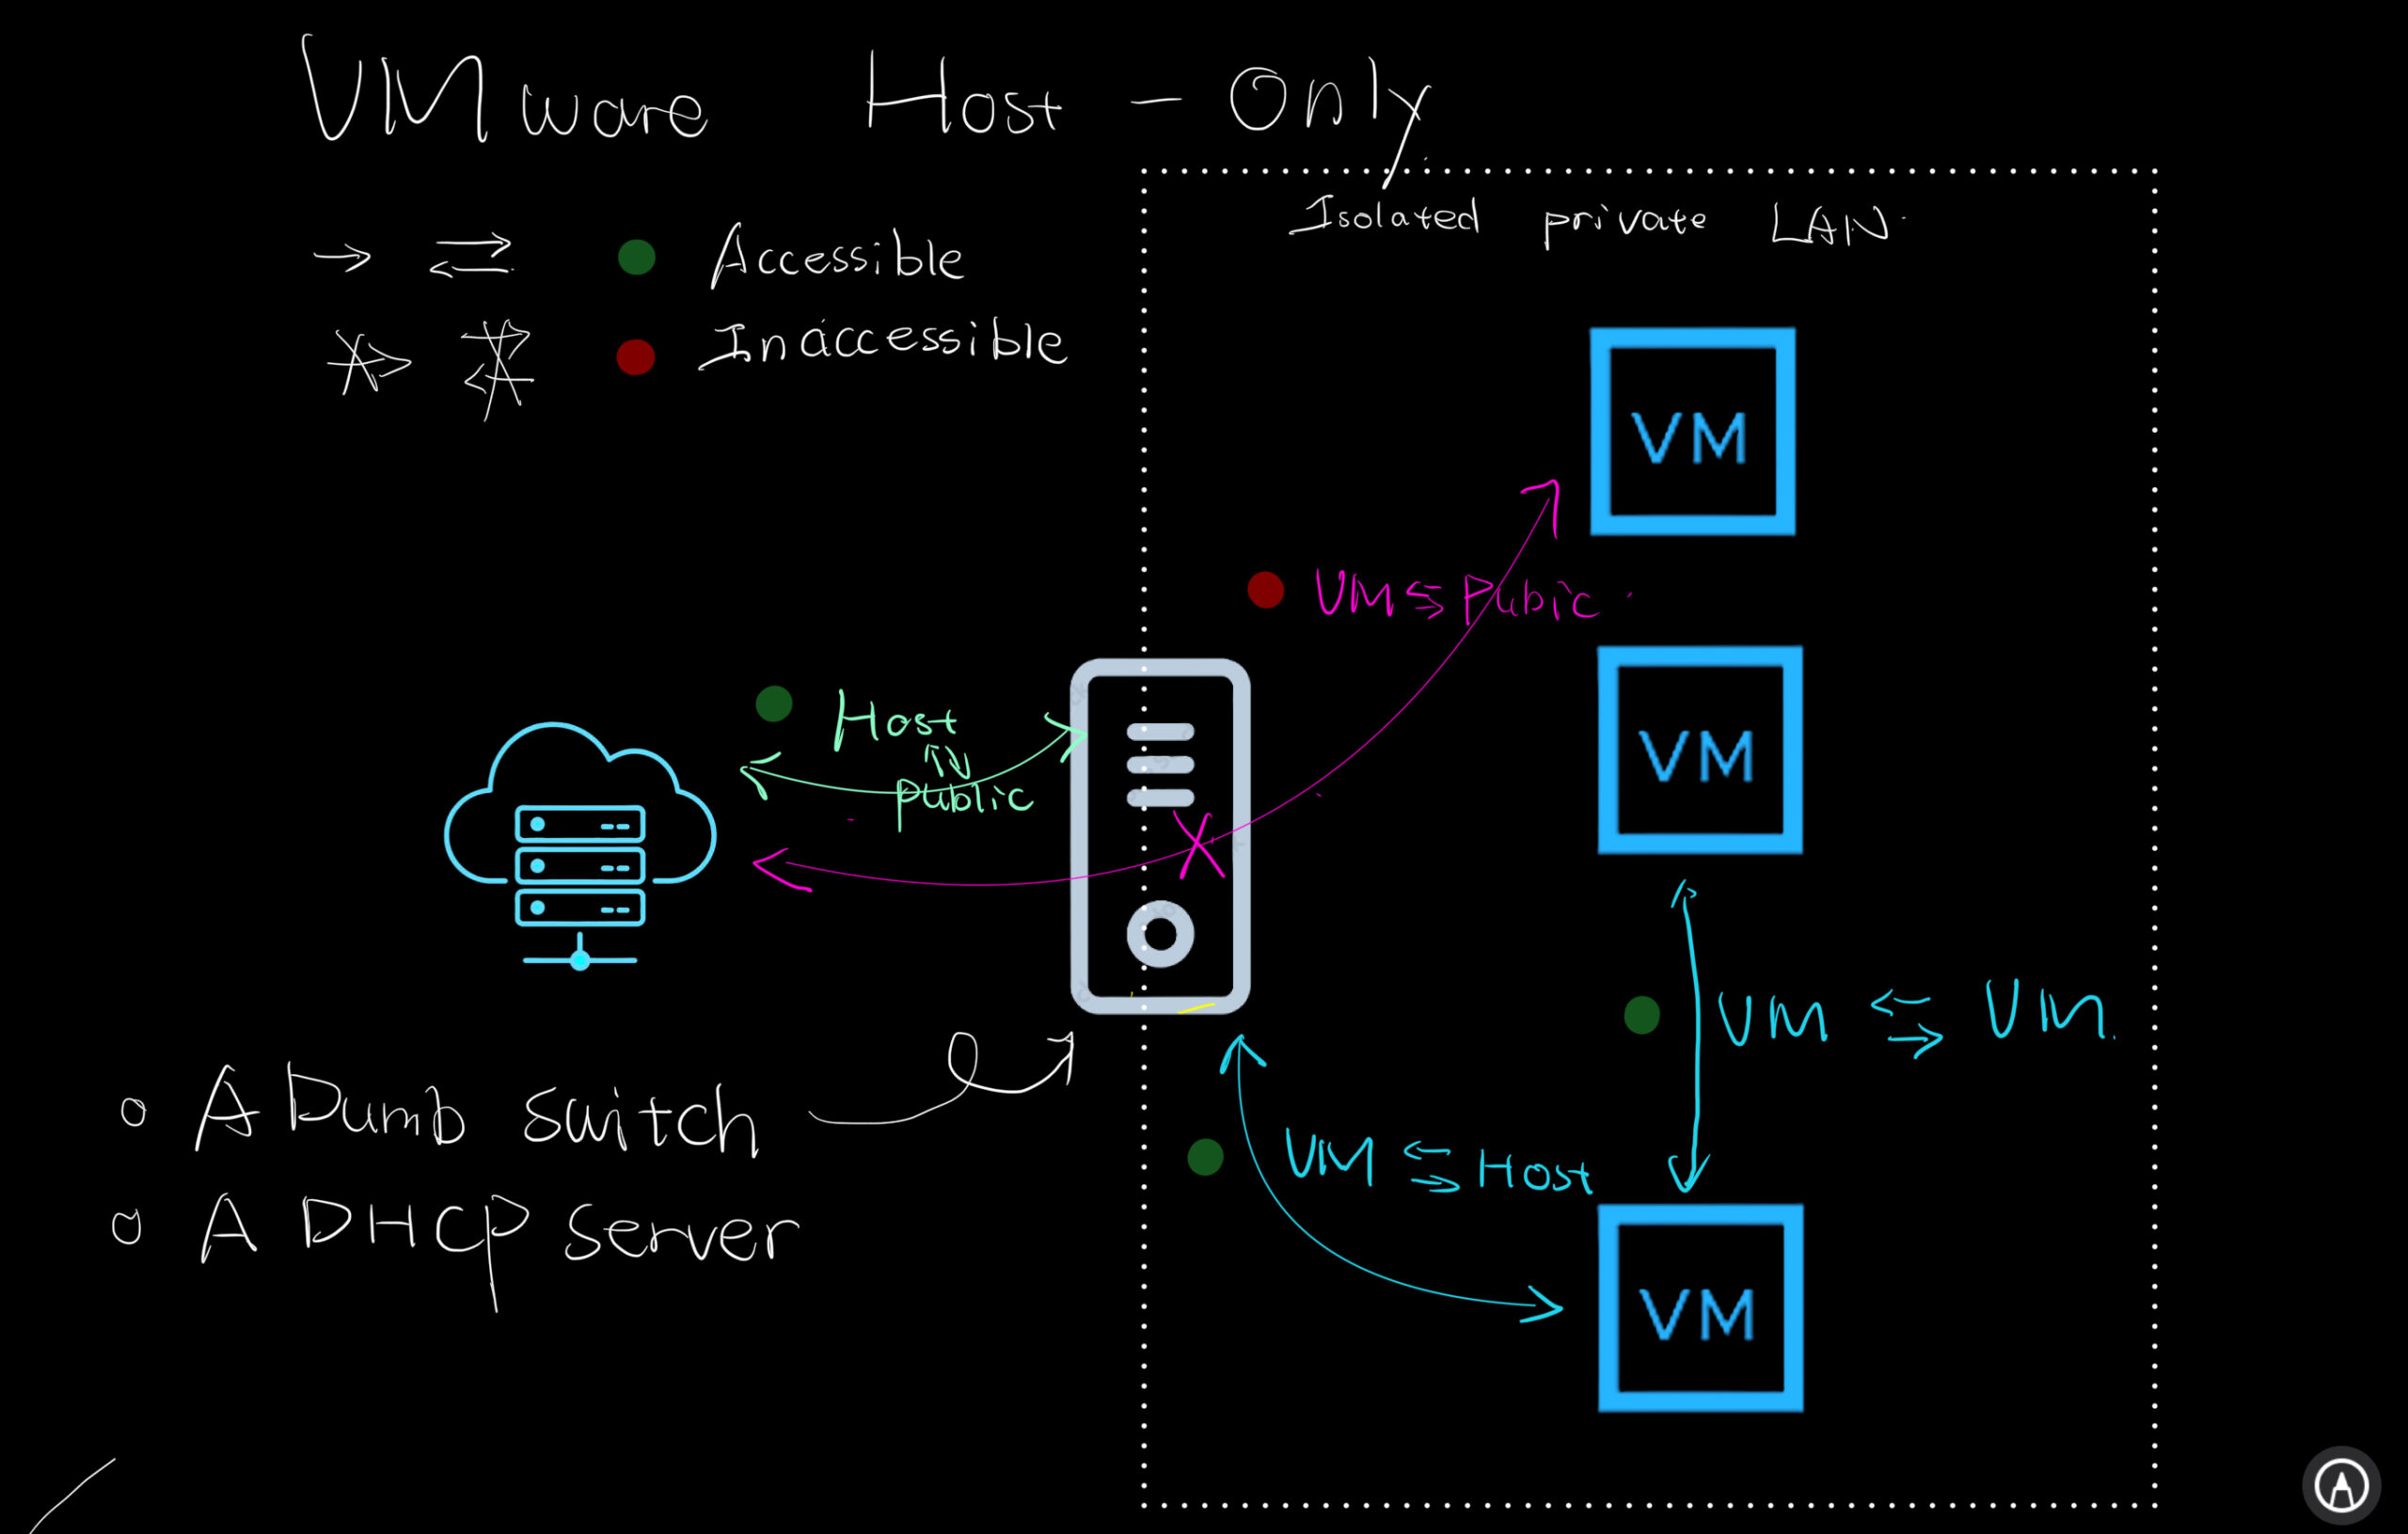
- Host-Only
Here’s a simpler table of their properties:
| Mode | Description | Internet Access | Visibility | Use Case |
|---|---|---|---|---|
| Bridged | Connects directly to the physical network. | Yes (direct) | Visible on external network. | For direct communication with other devices on the network. |
| NAT | Shares host’s IP address via NAT. | Yes (via host) | Not visible externally. | For secure Internet access without exposing the VM. |
| Host-Only | Isolated network with the host only. | No (unless bridged) | Only visible to the host. | For testing in a private network. |
Bridged

NAT

Host-Only
Topology Diagram In This Case
Here is a demo and common config of OpenWRT, and REG will continue with this topology diagram
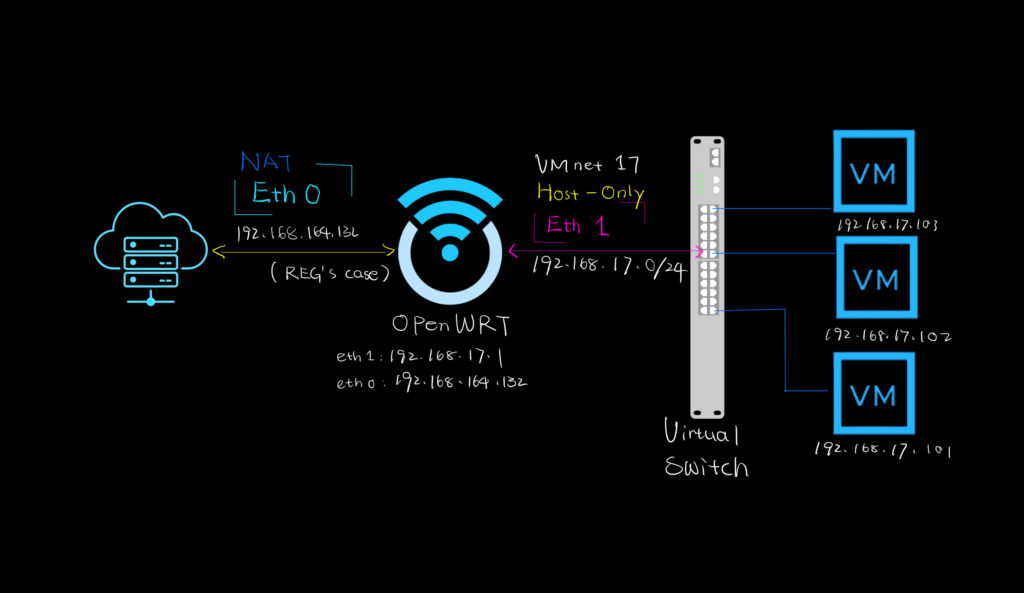
As we can see in this case the openwrt has 2 network interfaces:
| VMNET | MODE | IP ADDRSS | NOTE | |
| ETH 0 | VMnet8 | NAT | 192.168.164.132 (DHCP) | Internet connection (WAN) |
| ETH 1 | VMnet17 | Host-Only | 192.168.17.1 (STATIC) | Managed Network (LAN) |
[0] Find and open “Virtual Network Editor”
You could found this tool in >Edit->Virtual Network Editor

Or just in your windows start menu

it should like this (REG’s might different like yours)
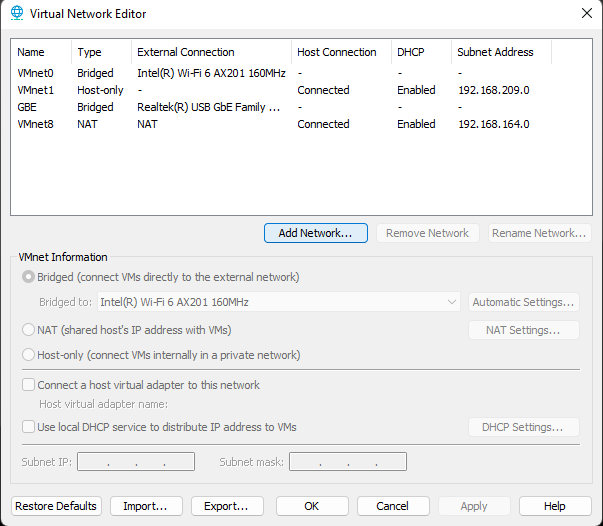
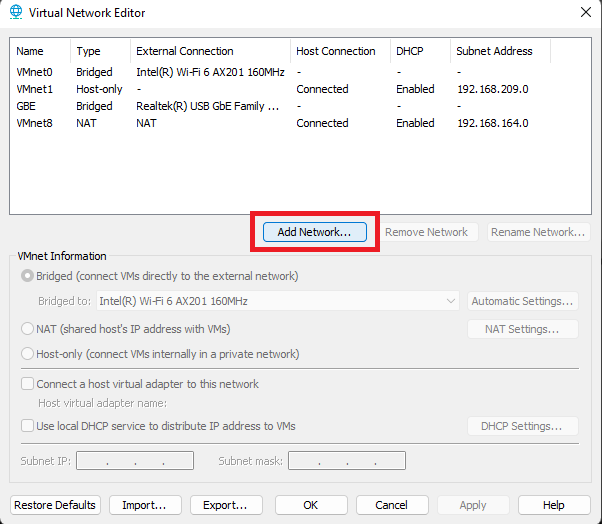
[1] Add a new virtual network for eth1
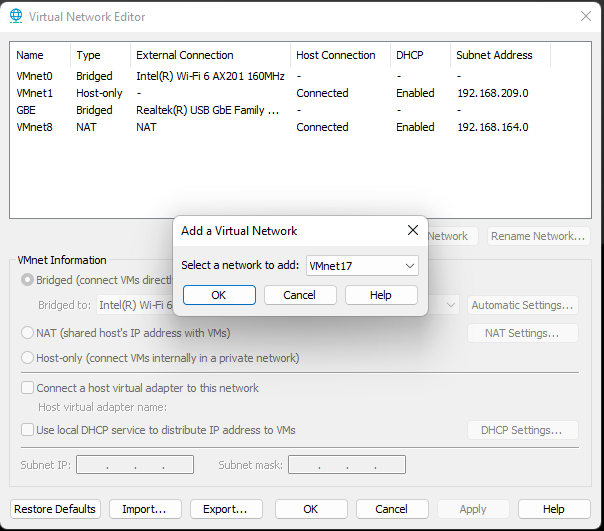
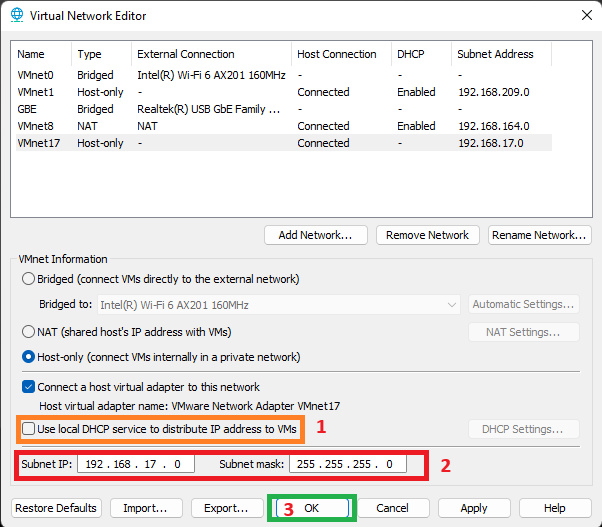
<!> NOTE : plz UNCHECK the “Use local DHCP service to distribute IP address to VMs”, cuz we would like to use the openwrt as a DHCP server.
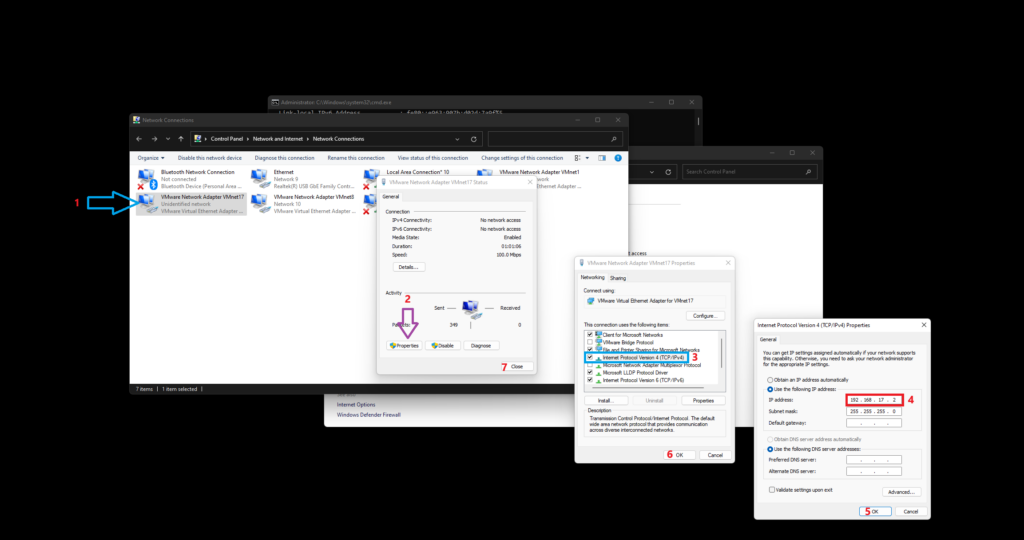
[2] set host’s static address
after u set up the VMnet17 you could go and check if it works:
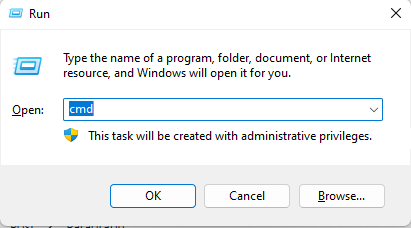
Press “Win + R” and enter “cmd” the press enter
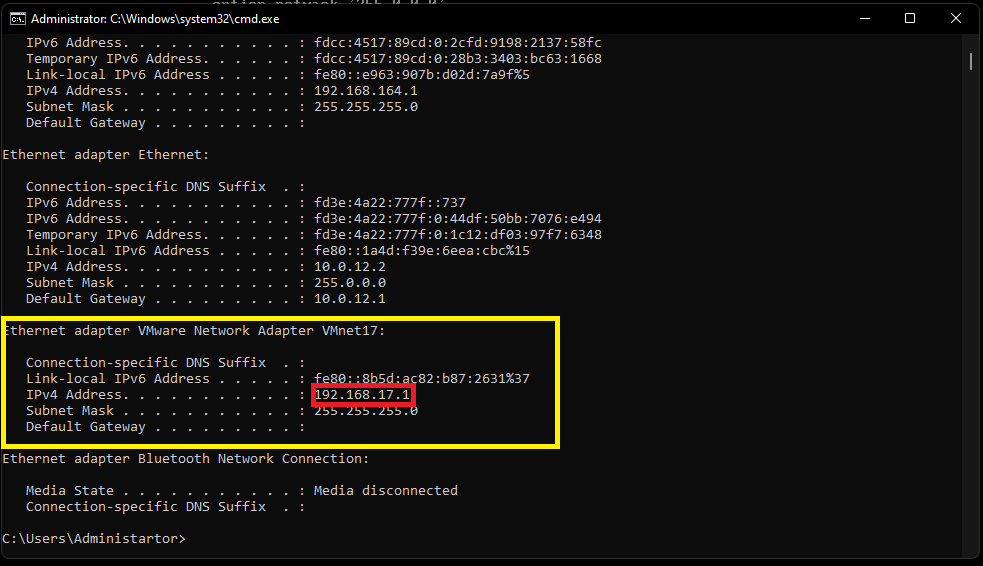
in cmd window enter
ipconfig
refer to your VM net (in this case VMnet 17)
You can find the host has obtained a ip address 192.168.17.1 automatically
but what if we want openwrt be the first ?
in cmd enter
control
in Windows control panel go to >Network and Internet -> Network and Sharing Center ->Change adapter Settings
and find your VMnet there
[3] Add VMnet to Virtual Machine


Install OpenWRT
[0] Find out your OpenWRT version
Go to https://downloads.openwrt.org


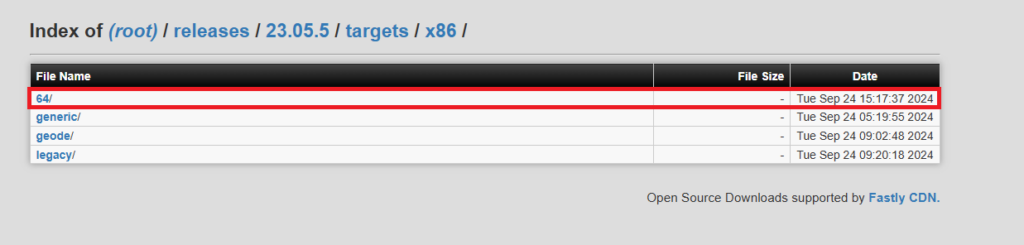
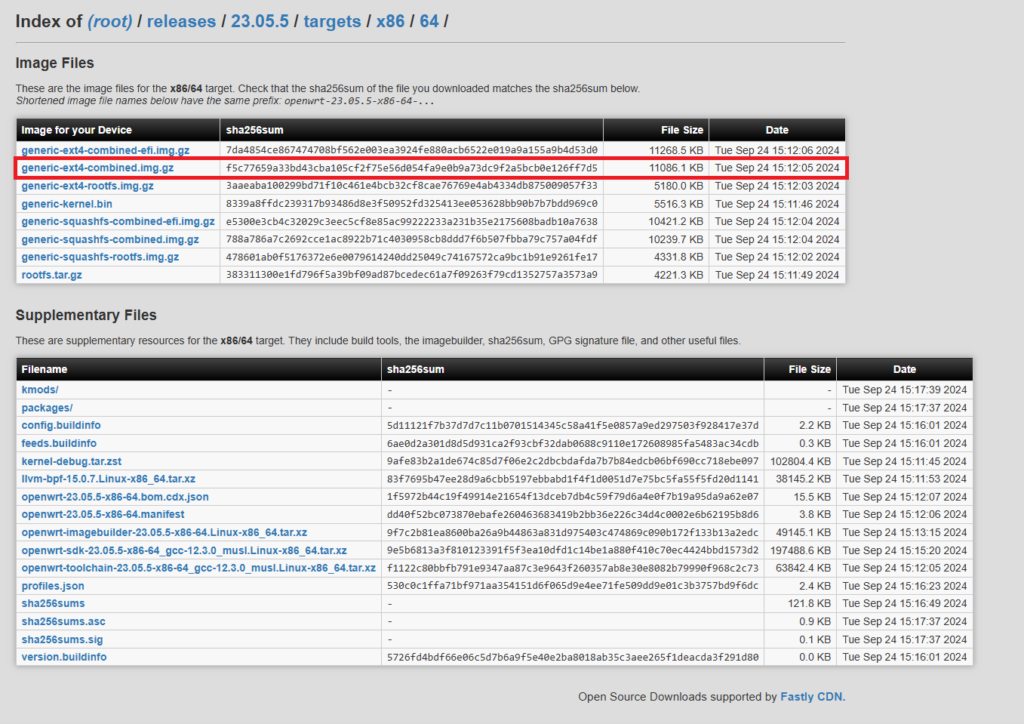
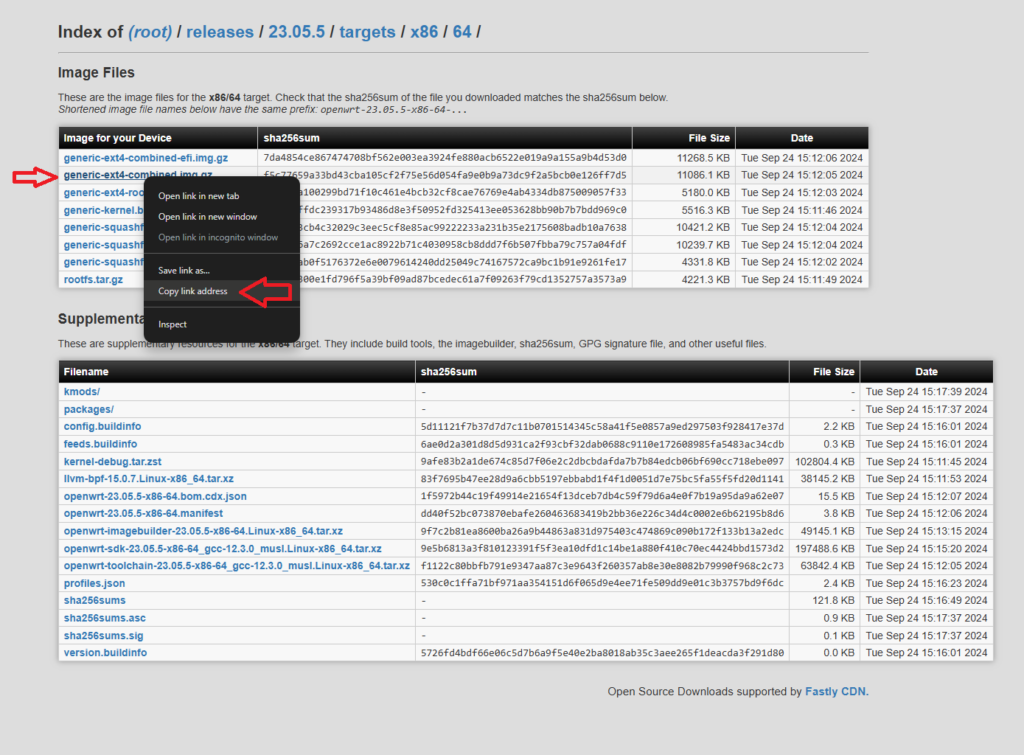
Just copy the download link
[1] Boot Finix CD
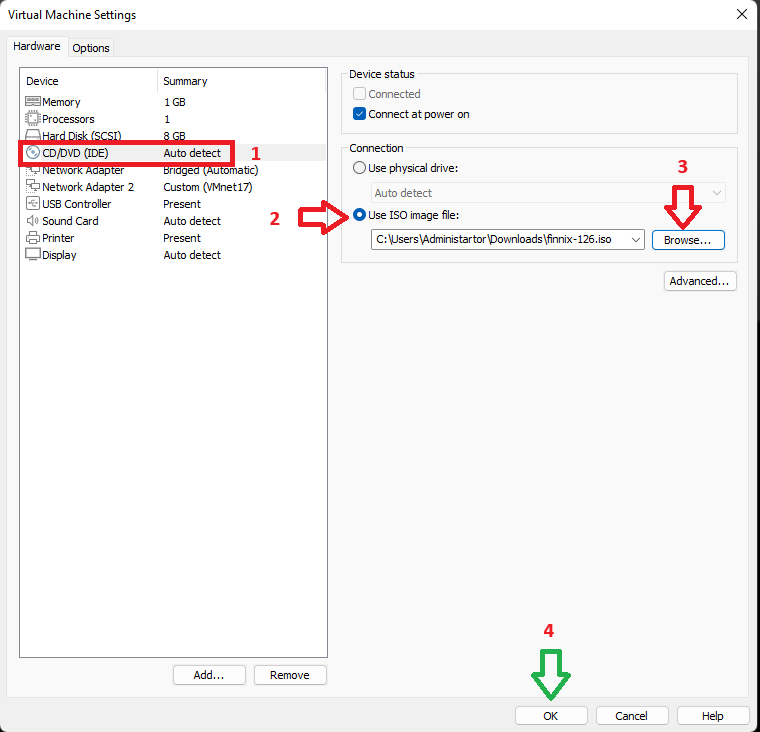
After that boot your system –just “Power on this virtual machine”.
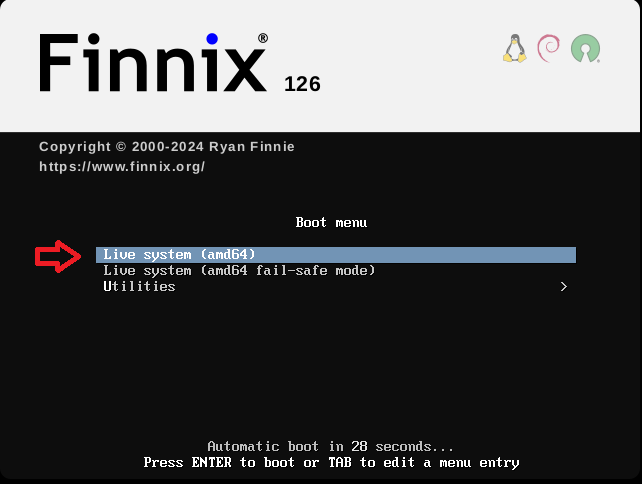

If everything is ok it should look like this
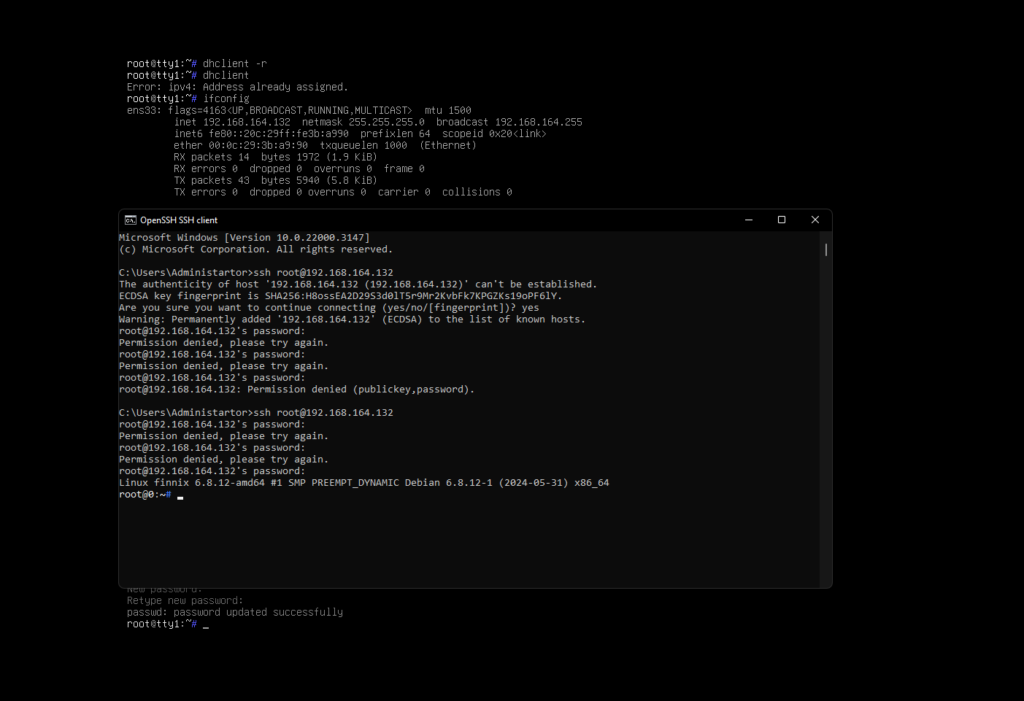
[2] Check Internet connection
you can chk the connecting by following commads
ping www.bing.com
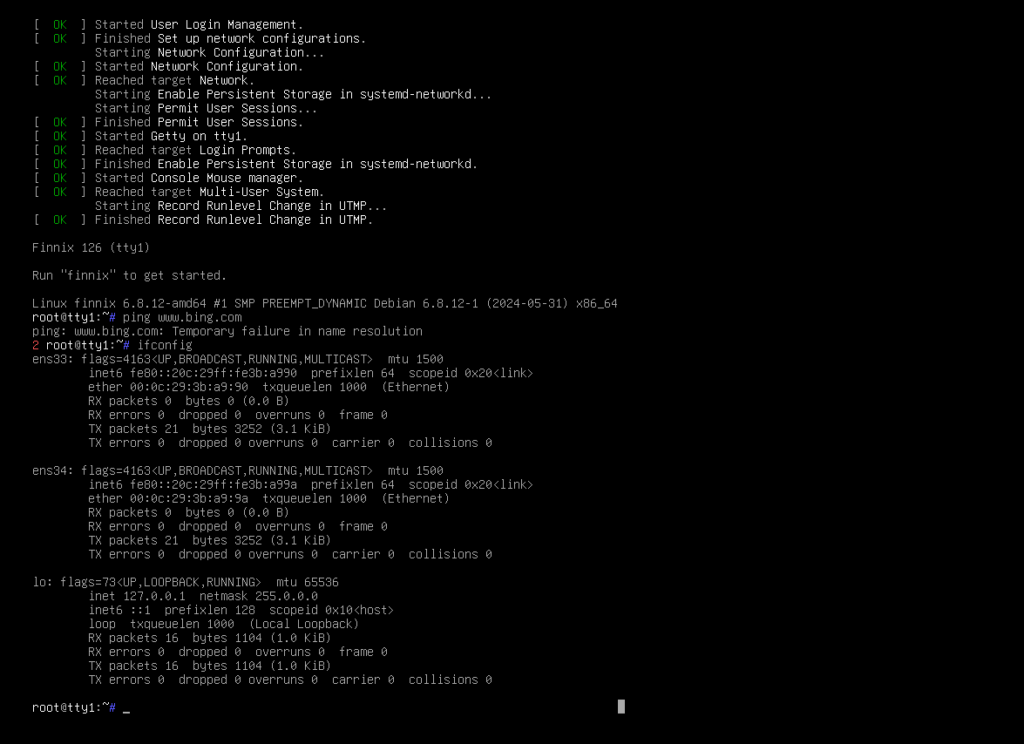
In this case there is something wrong with the nic settings
So REG try , and find out that the finix didn’t obtain ip correctly.
ifconfig
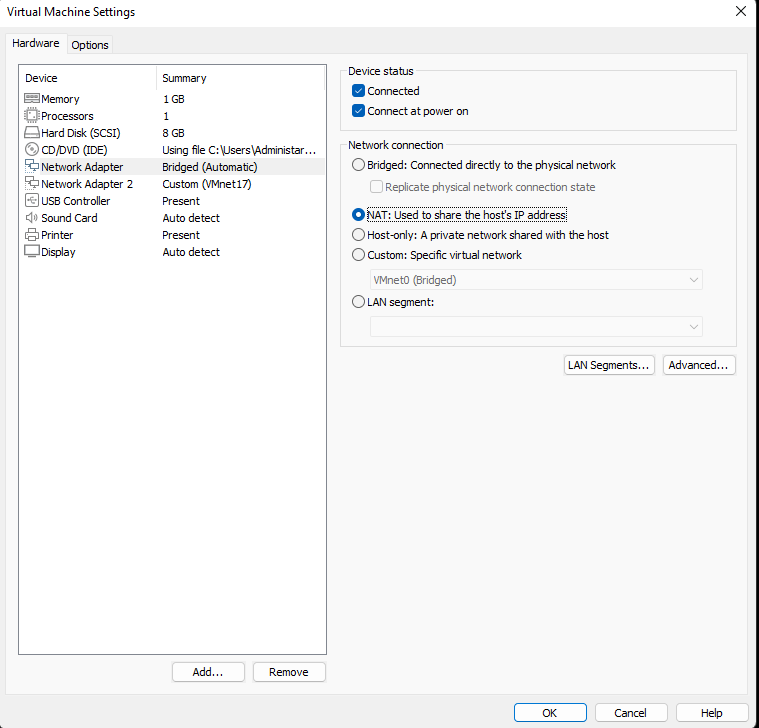
Go to change an nic setting to NAT (share network with host)
Refresh and request a new ip address
dhclient -r
dhclient
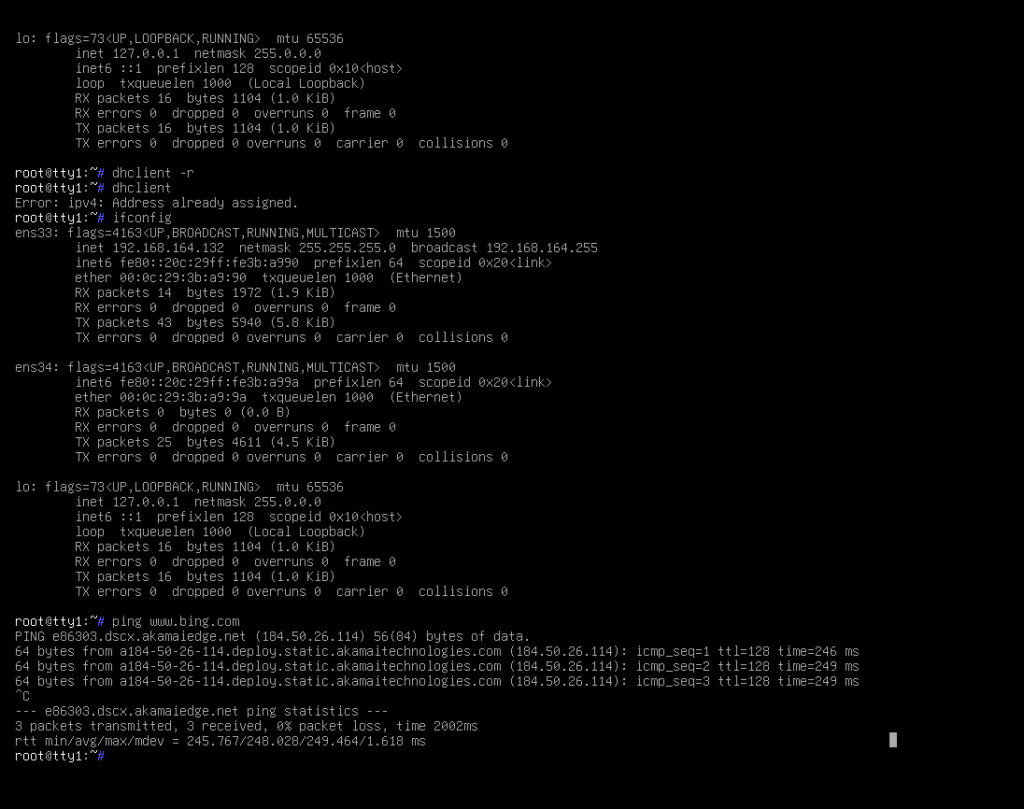
After done refreshig everything is ok.
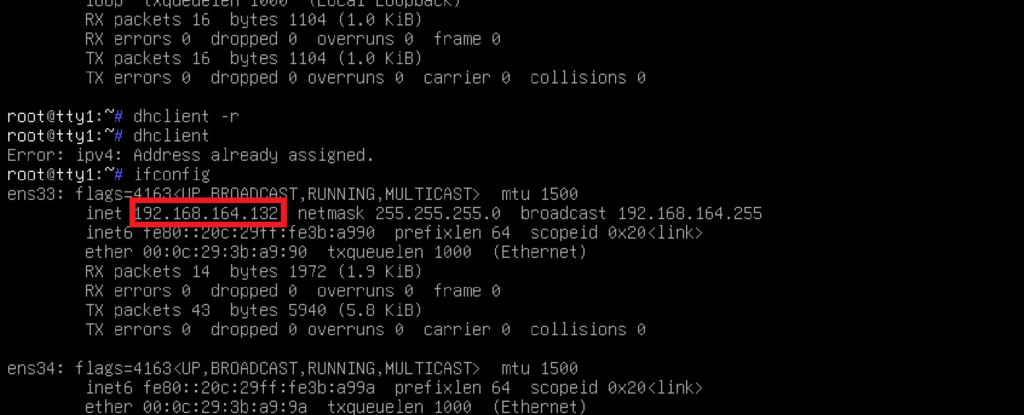
Write down this ip addr we will talk it later
Finally don’t forget to set root password and start ssh server:
passwd root
service ssh restart
[3] Download and install OpenWRT
The most exciting moment is finally here!
In Windows ssh to your finix (IN this case 192.168.164.132)
ssh [email protected]
download the openwrt wget the link u have just copied:
wget https://downloads.openwrt.org/releases/23.05.5/targets/x86/64/openwrt-23.05.5-x86-64-generic-ext4-combined.img.gz
unzip img file using gzip:
gzip -d openwrt-23.05.4-x86-64-generic-ext4-combined-efi.img.gz
display the disk info
lsblk

we would like to install it into sda
dd if=openwrt-23.05.4-x86-64-generic-ext4-combined-efi.img.gz of=/dev/sda
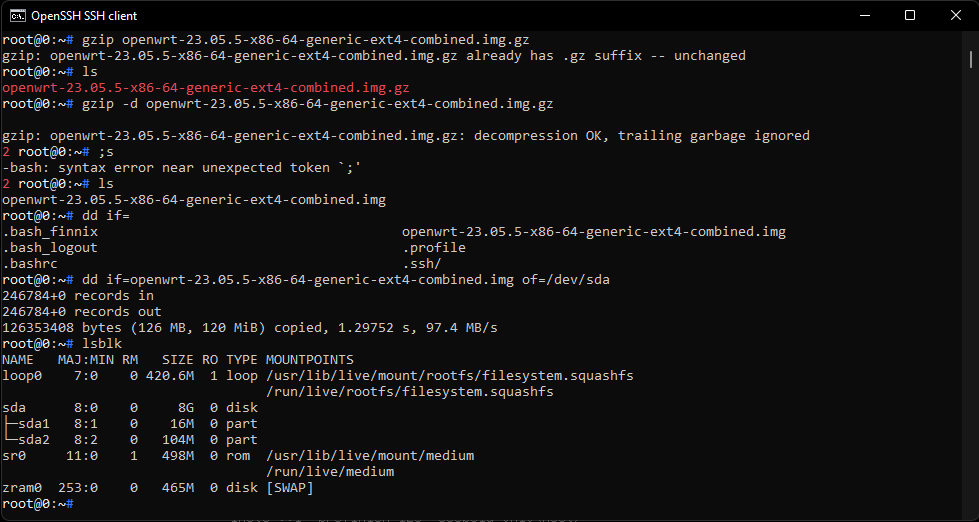
and it should like this :>
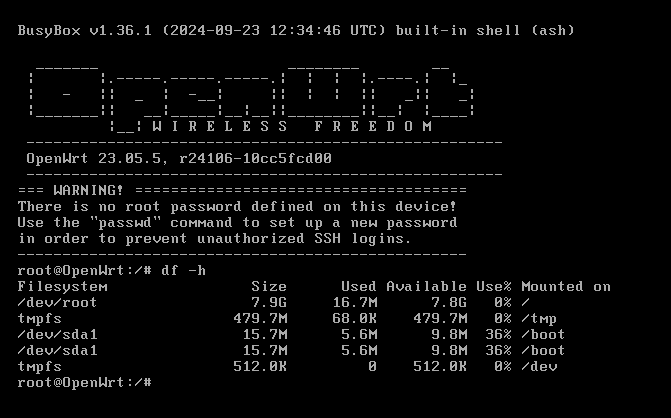
Congratulations! You just have openwrt installed
But REG would recommend you do a root partition expand before you reboot your vm
Expanding root partition and filesystem
Reference docs:
https://openwrt.org/docs/guide-user/installation/openwrt_x86
https://openwrt.org/docs/guide-user/advanced/expand_root
[0] Recreate Partition
fdisk /dev/sda

enter “m” for help and menu
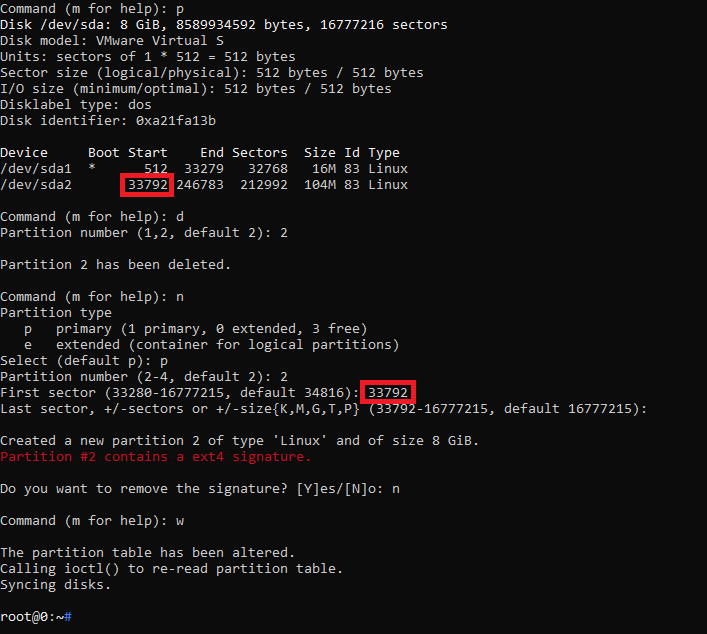
enter “p” print disk info remember the number in the red square:

enter “d”
enter “2”
to delete partition 2
enter “n” create new partition
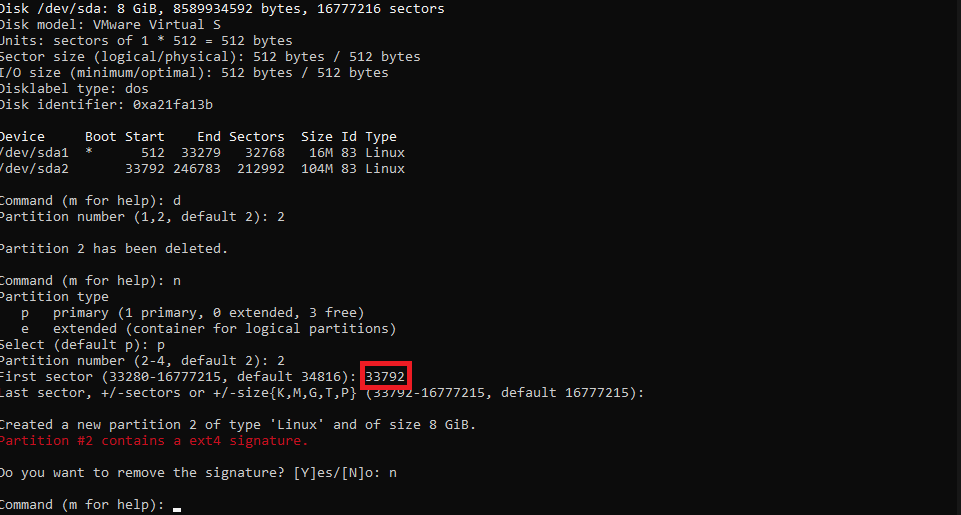
enter “p” for a primary partition
enter the number you have just remembered
enter “n” not del signature
Finally
enter “w” to save changes
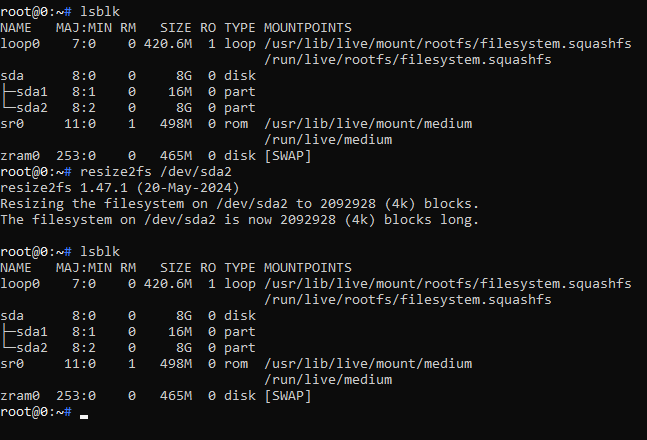
[1] Resize Filesystem
run cmd
resize2fs /dev/sda2
if there is an exception like this :
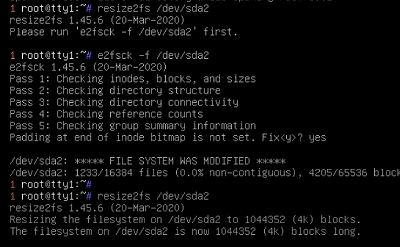
just run as following command:
e2fsck -f /dev/sda2
after that resize2fs again
resize2fs /dev/sda2
then u can run lsblk to chk if everything is ok u can reboot vm.
Adjust Network Settings From Console
[0] Check ip address
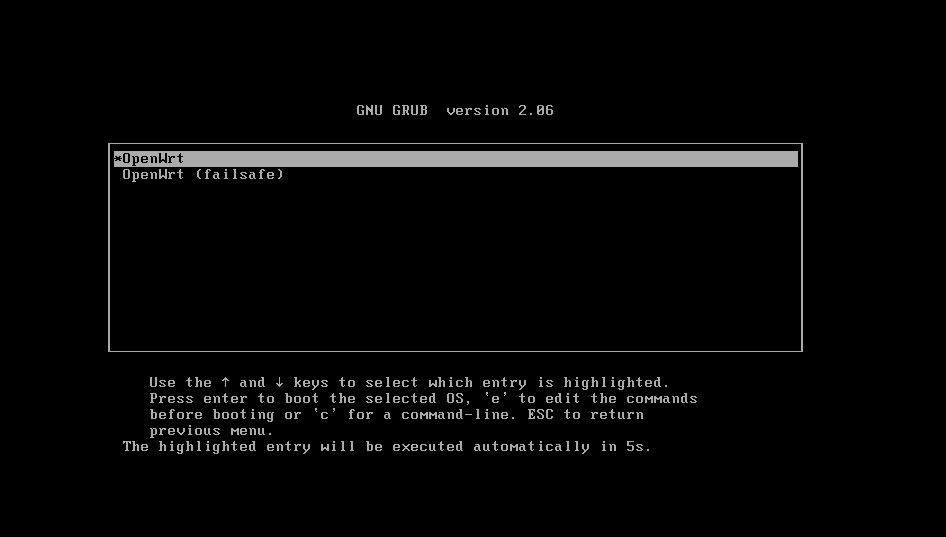
After you reboot your vm :

so press “ENTER” to active the console
ifconfig | grep addr
to check the ip address
In REG’s case the openwrt didn’t obtain ip address correctly
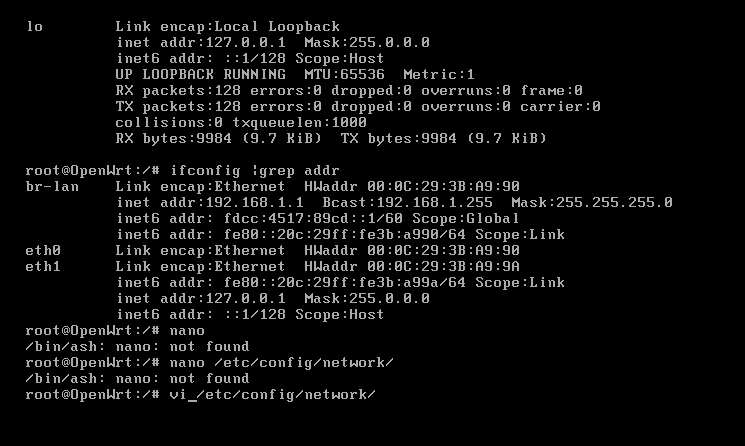
[1] Modify configurations
So let’s do some modification to the networkconfig
vi /etc/config/network
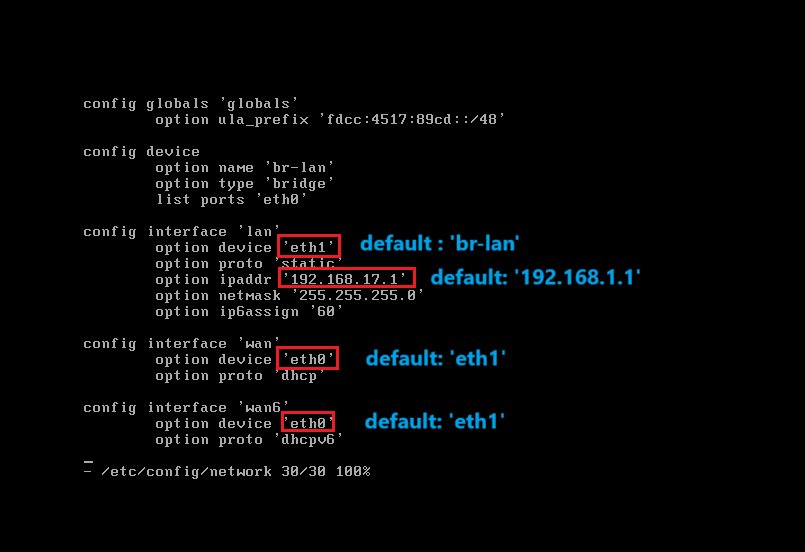
Hint: Press “i” to modify the file and “ESC” to exit editing, and after exit editing enter “:” and “wq” to write config. “:!q” will exit vi forcefully.
Interface ‘lan’ is our managed network so we need to set static ip addr for openwrt, in ths case we use vmnet 17 so it would be “192.168.17.x” but for gateway, we use “192.168.17.1”.
Interface ‘wan’ is for openwrt itself and machines in ‘lan’ to gain access to internet and in previous configuration we have made the dhcp in vmnet8 enabled *(default setting in vmware workstation). wo we just use ‘dhcp’
Interface ‘wan6’ is the ipv6 config, you can make it same as ‘wan’ or just delete it.
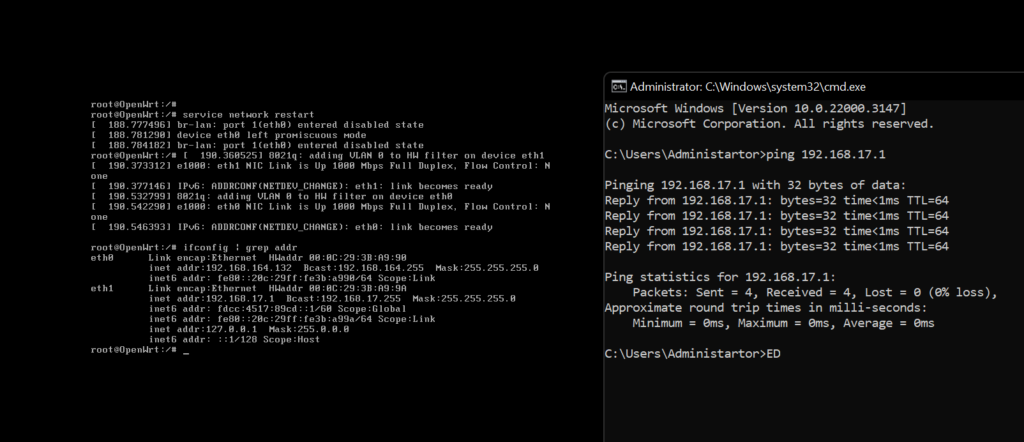
[2] Restart Network and Test Connection
After you change your configs just run:
service network restart
to restart your network services
Then back to your host
ping 192.168.17.1
Visit WebUI and Enjoy openWRT
It is recommend to visit webui from ‘lan’ , cuz we have not config the firewall yet.
http://192.168.17.1 (REG’s case)
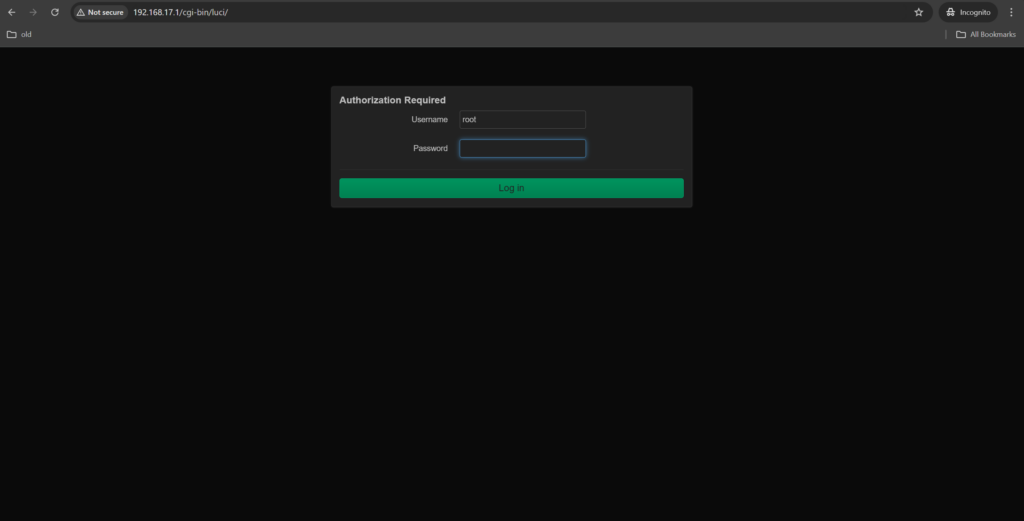
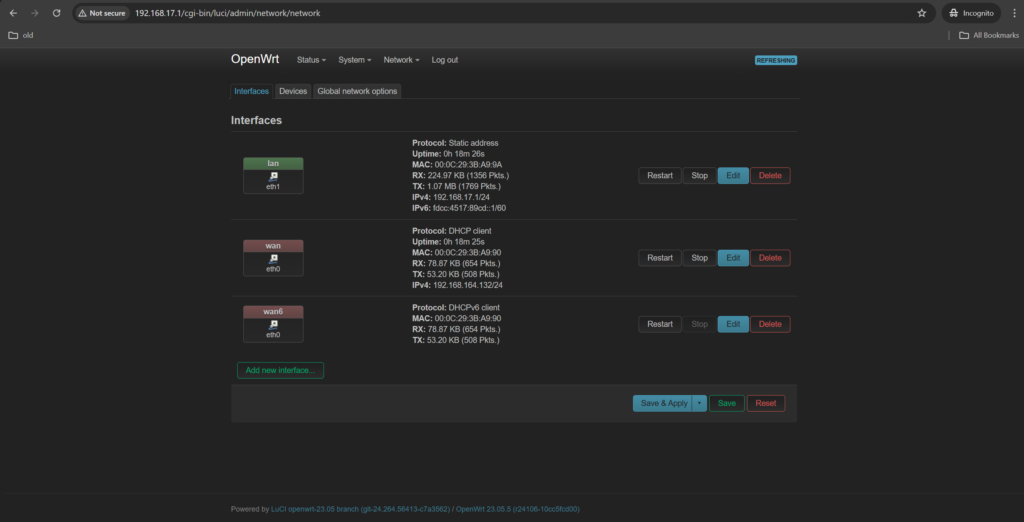
Congratulations and enjoy playing with your OpenWRT!
The Bottom Line
Thank you for reading,
If you have any questions or suggestions, feel free to leave a comment below, and stay tuned for more content!
<!> Reprinting is allowed only with proper attribution to the original source.